Buying guide
How to Charge a Power Station With Solar Panels
Match the panel to the input, follow the sun—not the marketing math—and get a realistic estimate of your recharge time.
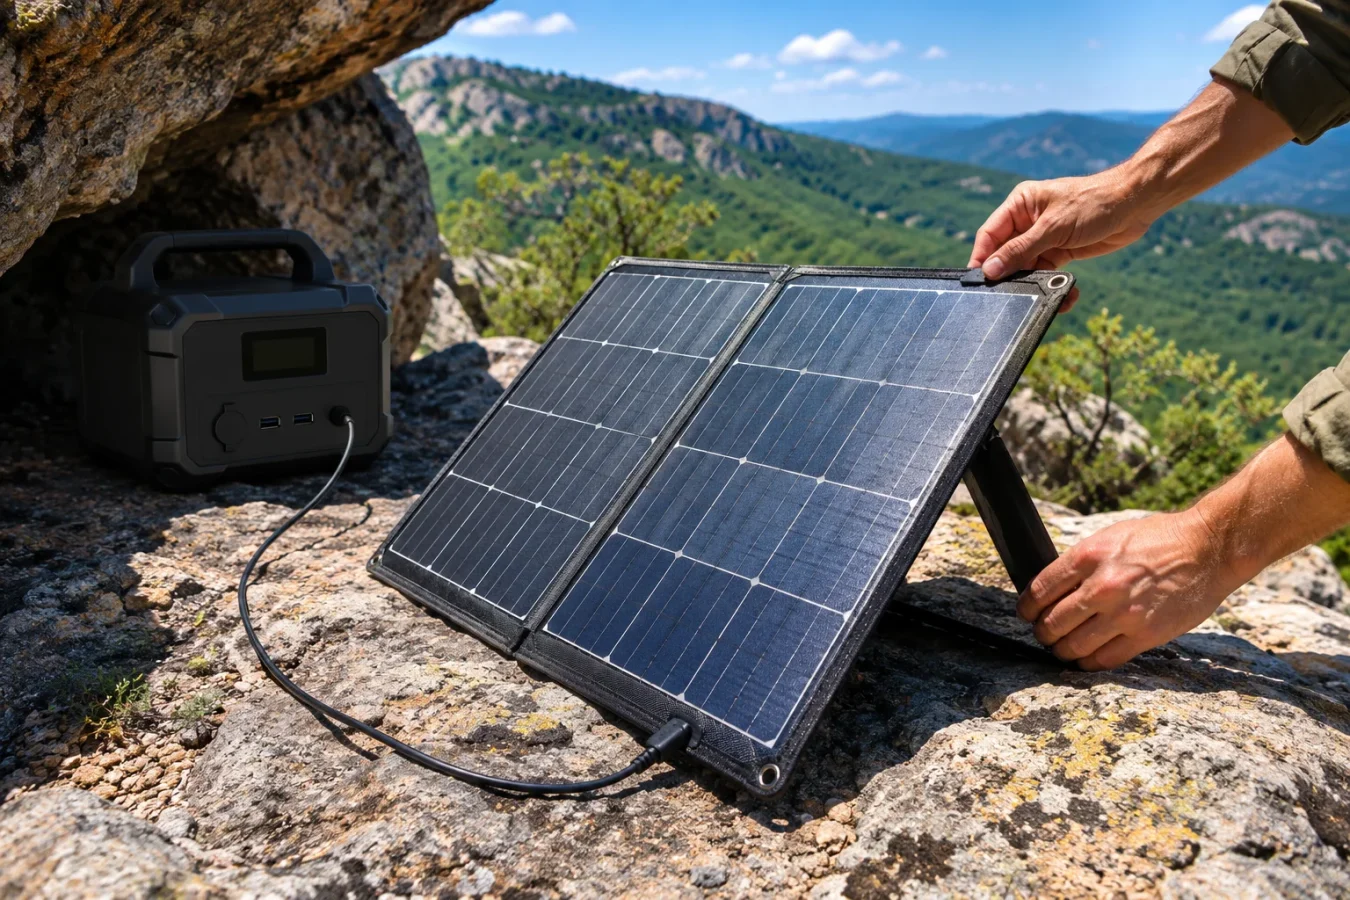
A sunny afternoon can put real charge back into a power station—but only if the panel array fits the station’s solar input limits. A panel that is too small may crawl through a cloudy campsite day; an array with the wrong voltage can exceed the station’s safe input range. And a panel’s advertised wattage is not a promise of continuous charging power.
This guide explains how to read solar input limits, choose series or parallel wiring, estimate charge time from watt-hours and peak sun hours, and improve panel placement. You’ll also find six power stations as illustrations of different capacity and solar-input considerations, plus a checklist for camping, van travel, and blackout preparation.
Our examples draw on manufacturer-listed specifications, value-for-size labels, and Amazon buyer-rating volume—not physical product testing. We rank the examples by how useful the available solar details are for this guide, then by capacity and stated value where relevant. For a broader overview, see our solar generator guide and our complete power station buying guide.
Solar charging starts with the power station’s input limits
Before choosing panels, find the station’s maximum solar input in watts and its acceptable solar input voltage range. The watt limit is the most power the station can take from solar at once. The voltage window is the range the incoming panel array must stay within. Both matter: an array can be below the watt limit and still be incompatible if its voltage is outside the allowed range.
Check the station’s manual or product details for maximum solar watts, minimum and maximum input voltage, and maximum input current if stated. Then check the panel’s operating voltage and current, along with its open-circuit voltage (Voc). Voc can rise in cold conditions, so the array’s voltage must remain below the station’s maximum even when the panels are cold. If you’re unsure, confirm the connector and voltage requirements with the manufacturer before connecting.
Panel wattage is a rating under standard conditions, not a guaranteed output in your yard. Heat, haze, clouds, panel angle, and shading all reduce real power. A 200 W panel does not necessarily deliver 200 W to the station for hours. The station’s input ceiling also caps charging: panels that could produce more than the station accepts will not make it charge beyond that limit. For capacity planning, pair this guide with our watt-hour sizing guide.
Charge-time formula: include sun hours and conversion losses
A useful first estimate is: charge time in peak-sun hours = battery capacity in Wh ÷ usable solar input in W. For a more realistic planning estimate, account for conversion losses: hours = capacity in Wh × 0.85 ÷ average charging watts. The 0.85 factor is a practical allowance for energy lost in conversion. It does not account for clouds, shading, or changing sunlight, so those must be considered separately.
For example, a 1,000 Wh station receiving an average of 200 W would need about 4.25 hours of active charging under this formula. That means roughly 4.25 peak-sun hours at that average input—not necessarily 4.25 hours from sunrise to sunset. If your location and season provide four peak sun hours, the estimate is about one clear day; if they provide two, plan for longer or more than one day. Actual output changes as the sun moves and weather shifts.
Use the battery’s full capacity for a rough empty-to-full estimate. If you’re topping up, calculate only the energy needed. A 50% recharge of a 1,000 Wh battery is roughly 500 Wh before losses. For backup planning, think about daily energy as well as battery size: our 1,000 Wh runtime guide helps translate capacity into appliances and hours. Solar charging while the station is powering devices can also slow net battery recovery.
Series vs. parallel: what changes when panels are wired together?
In series, connect one panel’s positive lead to the next panel’s negative lead. Panel voltages add, while current stays about the same. Series wiring can help reach the voltage a station needs, but adding panels also raises total voltage. Keep the array within the power station’s voltage window, including the panels’ cold-weather open-circuit voltage.
In parallel, connect positive leads together and negative leads together using compatible branch connectors. Voltage stays about the same, while current adds. Parallel wiring can be useful when a station accepts the panel voltage but needs more current. The station’s maximum input current still applies, and each panel should be compatible with the others and the connector system.
Neither arrangement is automatically better. The station’s input range and the panel specifications determine the safe configuration. A series array may exceed the voltage ceiling; a parallel array may exceed current limits or require connectors rated for the combined current. Shading can also affect output differently depending on the panel and wiring setup. Use the manufacturer’s wiring guidance, respect polarity, and never force mismatched connectors together. If you’re building an RV or van setup, our RV and van-life guide covers the wider system-planning picture.
Solar power station examples: start with clearly stated solar figures
BLUETTI AC180: This is the clearest example here for planning around a stated solar input limit: its manufacturer-listed solar input is up to 500 W, and the stated full solar recharge time is 2.8–3.3 hours. It has a 1,152 Wh LiFePO4 battery and 1,800 W rated AC output. Its Amazon rating is 4.5 out of 5 from 1,900 ratings, and it carries an Excellent value label for its size class. Those solar figures are useful reference points, but real charge time still depends on sunlight and array conditions. See our BLUETTI AC180 review.
Anker SOLIX C1000: Its listed solar input reaches 600 W, with a claimed full recharge in 1.8 hours at that input. The 1,056 Wh station has a 4.7 out of 5 rating from 2,100 Amazon ratings and is labeled Good value for its size class. The solar-input figure makes it a useful illustration of matching a larger battery with a higher input ceiling. See our Anker SOLIX C1000 review.
These are examples, not universal panel recipes. Confirm the station’s current input limits, voltage range, and compatible cable before buying an array. Check the current price on Amazon.
More product examples: capacity matters, but so does compatibility
Jackery Explorer 1000 v2: Its 1,024 Wh capacity and LiFePO4 chemistry make it an illustration of a roughly 1kWh class station. It has a 4.7 out of 5 Amazon rating from 3,700 ratings and a Premium price value label for its size class. Its listed fast AC-charging feature is separate from solar charging; do not use AC recharge claims to infer solar input speed. Check the current solar input limits and compatible panel requirements before pairing it with an array. See our Jackery Explorer 1000 v2 review.
Jackery Explorer 300: With 292 Wh of capacity, it illustrates a compact station where a modest energy need may be easier to replenish than a large backup battery. It has a 4.6 out of 5 rating from 11,300 Amazon ratings and a Fair value label for its size class. Solar input numbers are not included here, so verify the station’s solar compatibility and input limits on Amazon before selecting a panel. See our Jackery Explorer 300 review.
Anker SOLIX 521: Its 256 Wh capacity and 300 W rated AC output suit small-load comparisons; its title identifies solar as an option, with a panel sold separately. It is rated 4.4 out of 5 from 3,100 ratings and has a Premium price label. Confirm its exact solar input range and connector match before ordering. See our Anker SOLIX 521 review.
Set up the panel for the sun you actually have
Point the panel toward the strongest available sunlight and adjust its angle as the sun moves. A panel lying flat may be convenient at a campsite, but it can collect less energy than a panel aimed more directly at the sun. There is no single best angle for every season and location; prioritize a clear, direct view of the sky and reposition when practical.
Shading deserves special attention. A narrow shadow from a branch, tent edge, or vehicle can cut output more than you might expect, especially if it falls across part of a panel. Keep the whole panel surface clear, and avoid placing it where people, doors, or awnings will cast moving shadows. Dust and debris can also reduce incoming light, so keep the surface clean according to the panel maker’s guidance.
Place the power station where it stays dry, ventilated, and protected from direct weather. Secure the panel and cable so wind or foot traffic cannot pull a connector loose. Connect only with the correct cable and polarity, and check the station display for incoming solar watts. That live number helps you spot a loose connection, shade, or poor angle. For outage preparation, include solar alongside other charging options in our hurricane and blackout checklist.
How to choose a panel and power station that work together
Choose the battery capacity from the energy you need, then choose the panel array from how quickly you want to replace that energy and how much sun is available. A small station can be practical for phones, lights, and occasional laptop charging; a 1kWh-class station offers more stored energy but needs more incoming energy to refill. Estimate daily use in watt-hours, then compare it with expected solar production across your available peak-sun hours.
Next, match the array to the station. Keep total panel wattage at or below the stated solar input limit if the manufacturer requires it, and make sure combined voltage and current stay within the station’s permitted range. Check connector type and any required solar cable or adapter. Connector fit alone does not prove electrical compatibility. Avoid assuming panels from different brands will work together without checking their electrical specifications and wiring instructions.
Use this quick checklist before purchase: capacity for your energy needs; maximum solar watts for desired recharge speed; voltage window and current limit for safe pairing; panel wiring plan for series or parallel; connector and cable compatibility; and sun exposure at your campsite, vehicle, or home. Compare options in our portable power station ranking and our home-backup guide. Check the current price on Amazon.
Solar charging mistakes that waste time—or risk damage
Buying by panel watts alone: A high-wattage array cannot override a station’s input ceiling, and its output varies with weather and angle. Ignoring voltage: Series wiring adds voltage, which can push an array beyond the station’s maximum. Always check the array’s voltage, including cold-weather Voc, against the station’s input range.
Assuming peak sun lasts all day: Peak-sun hours are an energy-planning measure, not a promise of steady output from dawn to dusk. Clouds, haze, heat, and a low sun angle reduce charging power. Use the formula as a planning estimate, not a guarantee of a particular finish time. Forgetting the load: If the station is running a fridge or other device while charging, some incoming power goes directly to that load instead of restoring the battery.
Overlooking shade and connectors: Even partial shade can reduce panel output, and a connector that physically fits may still be the wrong electrical match. Do not improvise with incompatible cables or reverse polarity. Confirm the port layout and cable requirements on the Amazon page before ordering, then follow the power station and panel manufacturers’ instructions. If backup loads are the priority, compare required runtime using our home-backup guide and our power station versus generator comparison.
Final recommendation: size for your real solar window
The best solar setup is not simply the one with the biggest panel. It is the one that respects the power station’s watt, voltage, and current limits while collecting enough energy during the hours you can actually place the panel in direct sun. Start with your daily watt-hour need, estimate available peak-sun hours, and use the 0.85-adjusted formula to set a realistic target. Leave room in the plan for clouds, shade, and charging loads.
For buyers comparing clearly stated solar specifications, the BLUETTI AC180 and Anker SOLIX C1000 provide useful examples: their listed solar inputs are up to 500 W and 600 W, respectively. For smaller-capacity comparisons, the Jackery Explorer 300 and Anker SOLIX 521 illustrate why checking exact solar compatibility matters as much as comparing battery capacity. Ratings, value labels, and features help frame a choice; they do not replace checking the panel-to-station electrical match.
Before you order, write down the station’s maximum solar watts, voltage window, and connector requirements. Compare them with the panel array’s operating voltage, Voc, current, and wiring plan. Then choose a safe location with little shade and a clear view of the sky. For more options by use case, see our solar generator picks, our camping guide, and our under-$1,000 guide.
Every model mentioned, at a glance
| Value for its size | Availability | |||||||||
|---|---|---|---|---|---|---|---|---|---|---|
| BLUETTI AC180 Best overall | 8.2 | 1,152 | 1,800 | Yes | See listing | 500 | See listing | 4.51,900 ratings | Excellent value | Check price on Amazon |
| Anker SOLIX C1000 | 6.2 | 1,056 | See listing | Not stated | See listing | 600 | See listing | 4.72,100 ratings | Good value | Check price on Amazon |
| Jackery Explorer 1000 v2 | 5.9 | 1,024 | See listing | Yes | 4000 | See listing | 25 | 4.73,700 ratings | Premium price | Check price on Amazon |
| Jackery Explorer 300 | 5.2 | 292 | See listing | Not stated | See listing | See listing | See listing | 4.611,300 ratings | Fair value | Check price on Amazon |
| Anker SOLIX 521 | 5.5 | 256 | 300 | Yes | See listing | See listing | See listing | 4.43,100 ratings | Premium price | Check price on Amazon |
Specifications as stated in the Amazon listing. Missing details: see listing. Scores use specifications and buyer ratings. How we rank.
Frequently asked questions
How do I calculate how long solar charging will take?
For a planning estimate, multiply the station’s capacity in watt-hours by 0.85, then divide by the average solar charging watts. For example, a 1,000Wh station receiving an average of 200W works out to about 4.25 hours of active charging. Sunlight varies, so treat peak-sun hours, clouds, panel angle, shade, and any devices running during charging as important adjustments.
Can I use a solar panel with more watts than my power station accepts?
The station will not charge faster than its solar input ceiling. More importantly, panel wattage is only one compatibility check: the array’s voltage and current must also remain within the station’s permitted input range. Follow the station manufacturer’s instructions for array sizing and wiring, and verify the panel’s electrical specifications before connecting it.
Is series or parallel wiring better for solar panels?
Neither is universally better. Series wiring adds panel voltage while current stays about the same; parallel wiring adds current while voltage stays about the same. Choose the arrangement that fits the station’s voltage and current limits. Check the array’s cold-weather open-circuit voltage before using series connections, and use compatible cables and connectors.
Do solar panels charge a power station on cloudy days?
They can still produce power in cloudy conditions, but output usually falls as direct sunlight is reduced. A cloudy day can extend charge time substantially, and heavy shade can make charging very slow. For dependable planning, use your local seasonal sun conditions rather than assuming the panel will produce its rated wattage continuously.
Can I use a power station while it is charging from solar?
Many stations support charging while powering devices, but check the specific model’s instructions. When loads run during solar charging, some incoming energy serves those devices instead of replenishing the battery. The battery may charge slowly or may not gain charge if the connected load uses as much power as the panels provide.
What should I check before connecting a solar panel?
Confirm the station’s maximum solar input watts, allowed voltage range, and any current limit. Compare those with the panel or array’s operating voltage, open-circuit voltage, current, and total wattage. Check connector and cable compatibility, polarity, and the manufacturer’s wiring guidance. Keep the panel unshaded and secure, and do not connect an array that exceeds the station’s limits.


